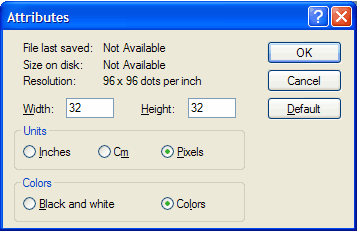
It’s shockingly easy to create your own icons in Windows XP. Let’s do it: Click Start, click All Programs, click Accessories, and then click Paint. On the Image menu, click Attributes. Type 32 for both the Width and Height of the document, and make sure that Pixels is selected under Units. Click OK to create a new 32×32-pixel document: the size of an icon.
Now add type, color, or do whatever you’d like to your image. I like to shrink photos (headshots work best) to 32×32 and simply paste them into my Paint document. When you’re finished, open the File menu and click Save As. Use the dialog box to choose where you want to save your file, then give it a name followed by “.ico” (without the quotes), and click Save. (The extension “.ico” tells Windows that it’s an icon file.) You just created an icon! Now you can change any shortcut or folder to your own icon—just browse to it on your hard drive.
It is easy to create your own icons in Windows XP. Let’s do it: Click Start, click All Programs, click Accessories, and then click Paint. On the Image menu, click Attributes. Type 32 for both the Width and Height of the document, and make sure that Pixels is selected under Units. Click OK to create a new 32×32-pixel document: the size of an icon.

Now add type, color, or do whatever you’d like to your image. I like to shrink photos (headshots work best) to 32×32 and simply paste them into my Paint document. When you’re finished, open the File menu and click Save As. Use the dialog box to choose where you want to save your file, then give it a name followed by “.ico” (without the quotes), and click Save. (The extension “.ico” tells Windows that it’s an icon file.) You just created an icon! Now you can change any shortcut or folder to your own icon—just browse to it on your hard drive.
![]()


 Today I will be sharing a pretty unknown trick to create hidden text files using nothing but Notepad, you can use this simple trick to hide plain text data without using any third-party utility or simply use it to impress your friends showing your geekness, the text files created using the method below won’t show anywhere in DOS or Windows irrespective of the hidden and system display file-settings, the files created using this can only be accessed if you know the correct file-name used while creating the file.